Overview
Administrative Units in Entra ID provide a flexible and efficient way to manage access and permissions within your organization, ensuring that administrators have the appropriate level of control over the resources they are responsible for.
Administrative Units (AUs) in Entra ID are a powerful feature designed to enhance role-based access control within an organization.
An AU acts as a container for users, groups, or devices, allowing you to delegate administrative permissions to specific subsets of your organization.
This means you can assign roles to administrators who only have control over the resources within their assigned AU, rather than the entire tenant.
For example, a large university with multiple autonomous schools can use AUs to give IT admins control over their respective schools. Each school’s IT team can manage users, set policies, and control access within their AU without interfering with other schools.
Administrative units are particularly useful for organizations with independent divisions or departments, as they allow for more granular control and delegation of administrative tasks. Additionally, AUs can help meet compliance requirements by restricting access to sensitive data and resources.
What I have recently been using it for is to get control of what groups are used for Conditional Access. This gives more robust control over the entire security posture of your Entra ID environment as we can restrict who has access to add users into Entra ID groups that controls granting or blocking access.
Let me show you how quickly and efficiently you can setup an Entra ID Administrative unit.
License requirement
Using Administrative Units require that the administrators of the AU’s have a Entra ID P1 license. So if you are running at least M365 E3/A3 or Microsoft 365 Business Premium of your administrators the you are good to go!
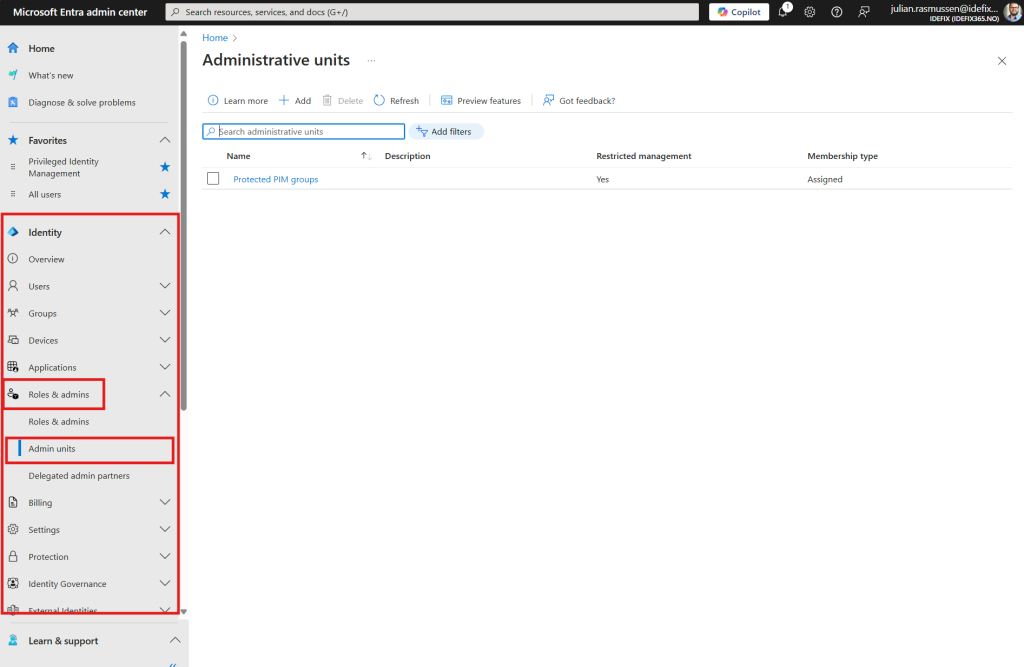
- Sign in to Entra ID Admin center (You need to at least have “Privileged Role Administrator role”)
- head over to “Identity -> Roles and admins -> Admin units”
Step 2 – Creating a Administrative unit
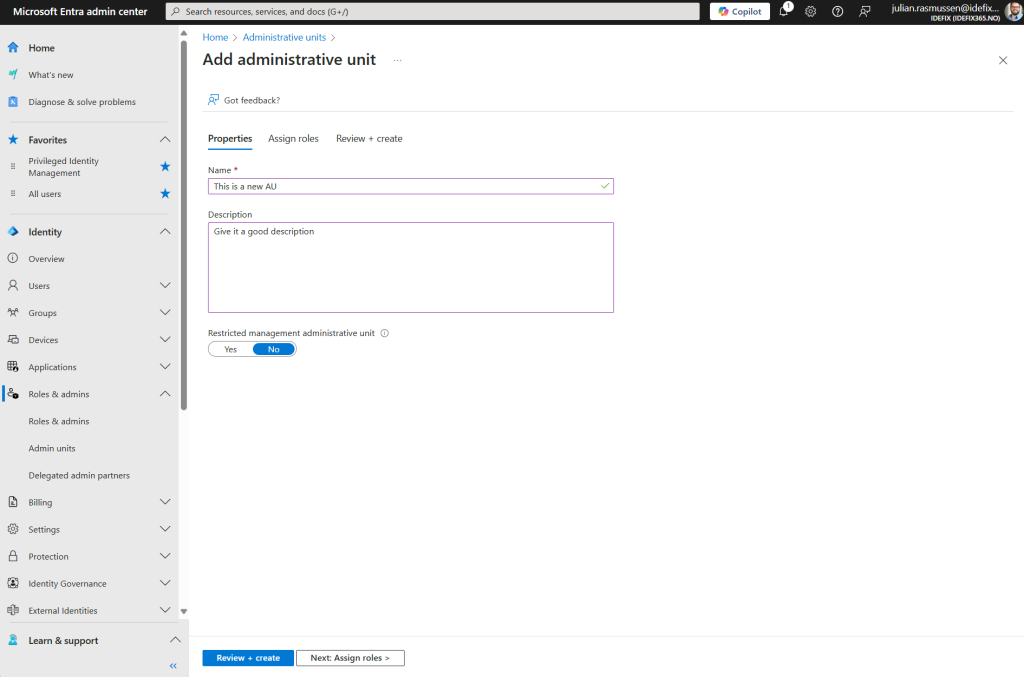
- Hit the “Add new” button
- Fill inn a name and description
- The “Restricted management administrative unit” feature is in Preview – but in short that will block other Global Admins that are not scoped to to changes within this AU to to changes on Users, Devices and Groups. More on this in a seperate blogpost 🙂
Step 3 – Delegating rights to other admins
- The next screen is delegating rights to other admins.
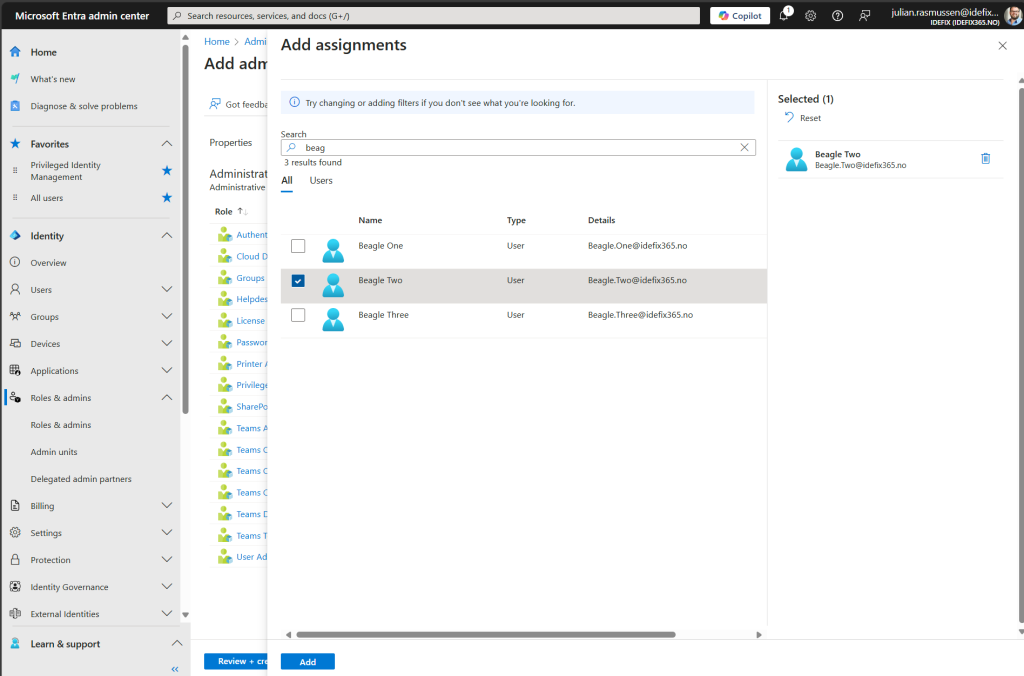
- Choose what RBAC role and to who that gains this access
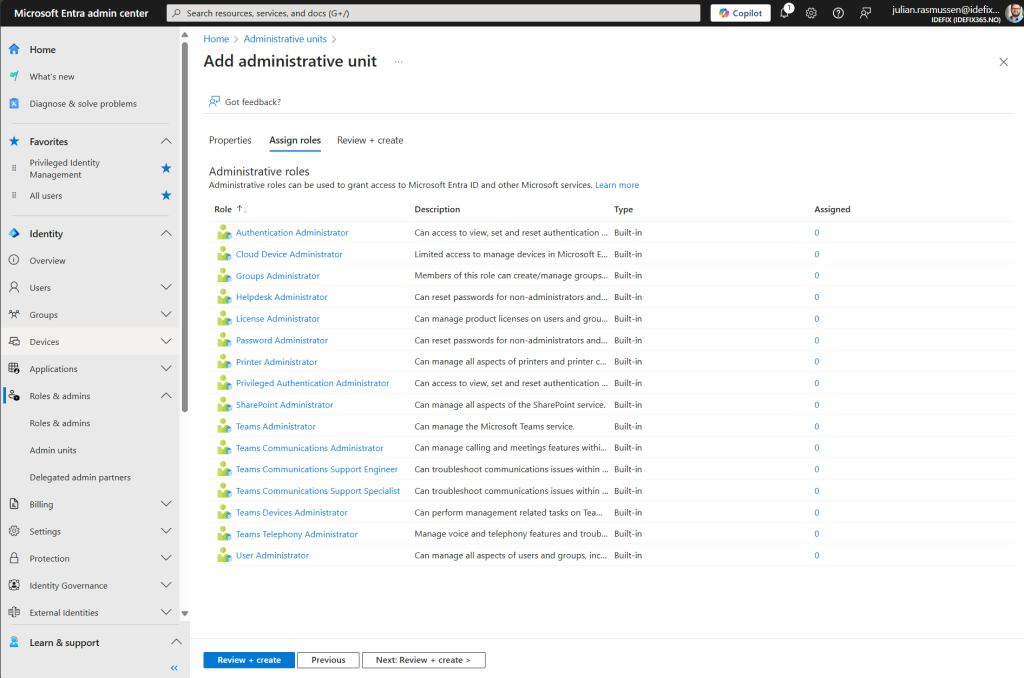
- In my demo-creation here I give my “Beagle Two” user “Groups Administrator” rights within this AU
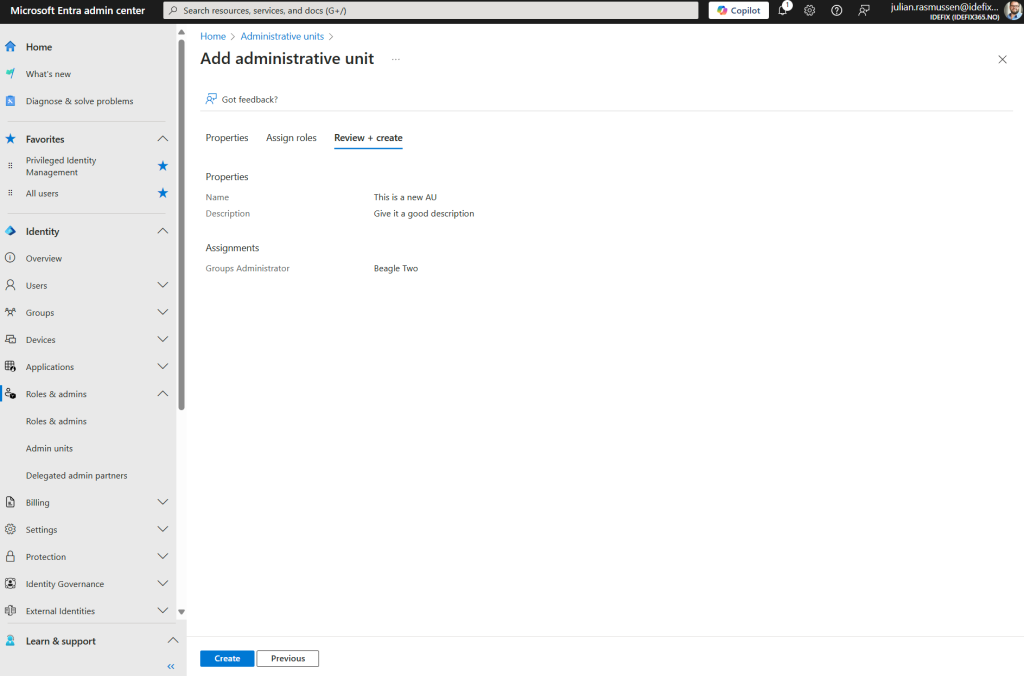
- Last part now is the review and create part where we get a nice overview of name, description and what permissions is givven.
- Hit “Create”
Step 4 – Add groups that can be managed
- Click in to your newly created AU
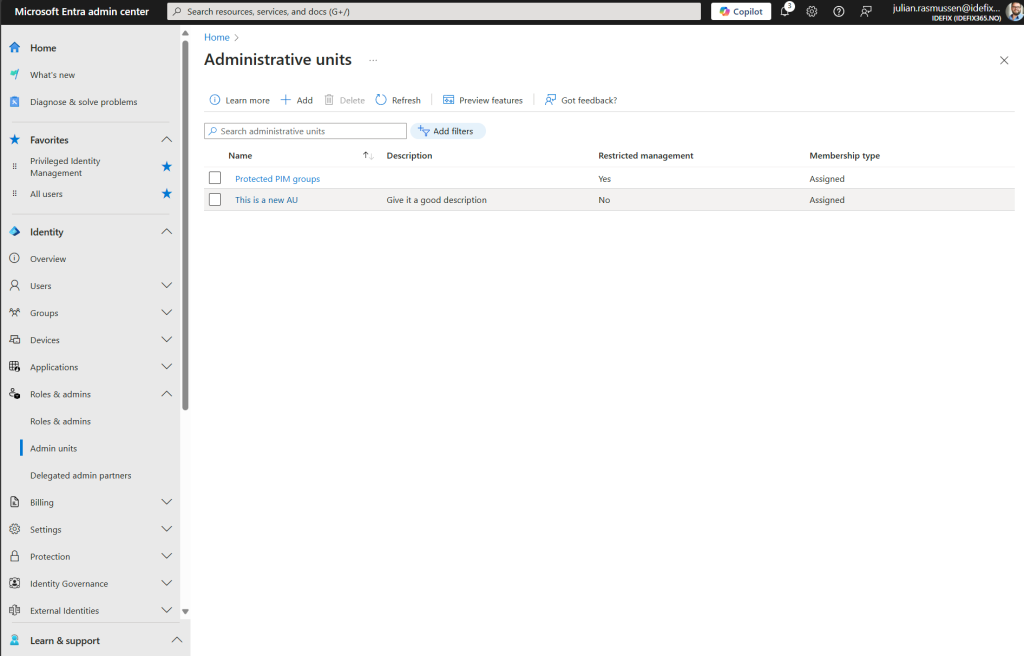
- From here we can add users, devices and groups into the AU. Those object that we add into this AU are objects that can be managed by the users we delegate rights to.
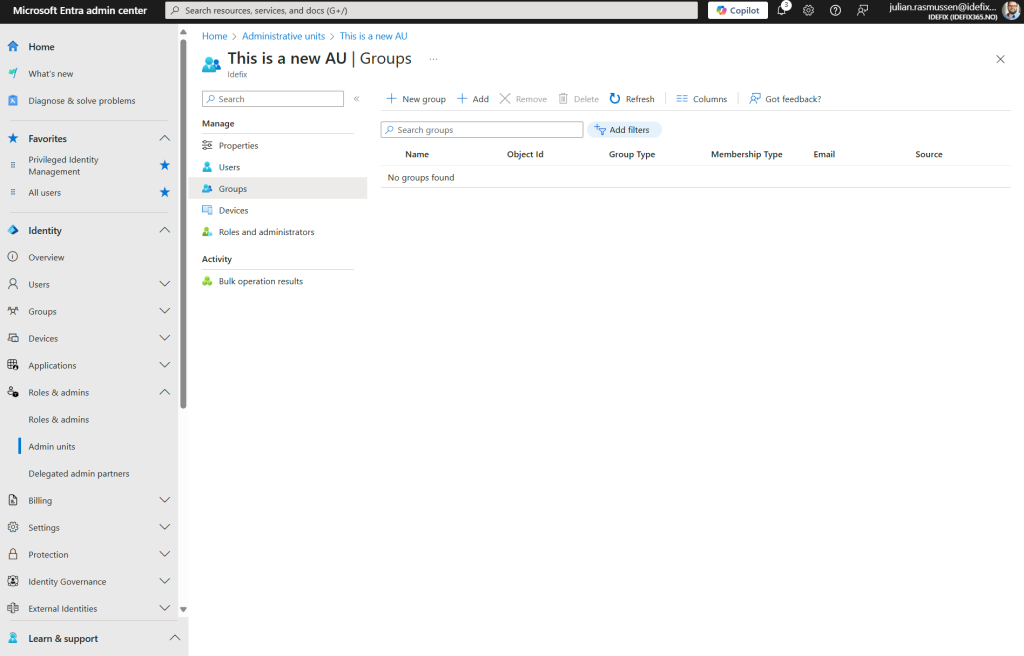
- As of Group managemenet that we have delegated within this AU – the “Beagle Two” user can create ned groups here, but as an Global Administrator or Privileged Role Administrator role we can add already created groups into this AU so that they can be managed by the administrators of this AU.
Summary
This blogpost outlines how Entra ID Administrative Units provide robust control over the security posture of your Entra ID environment by restricting access to specific resources and delegating administrative tasks to a wider range of administrators.


